

Module registry#
The Module registry contains the Terraform modules that can be used to create Resources. Tenant modules come from your Git repository; Reply CMP-managed modules are maintained by the platform team.
Navigate: left navigation → Provisioning → Module registry.
Understand the registry#
A module record represents one reusable Terraform folder. A version represents one immutable, reviewed commit of that folder.
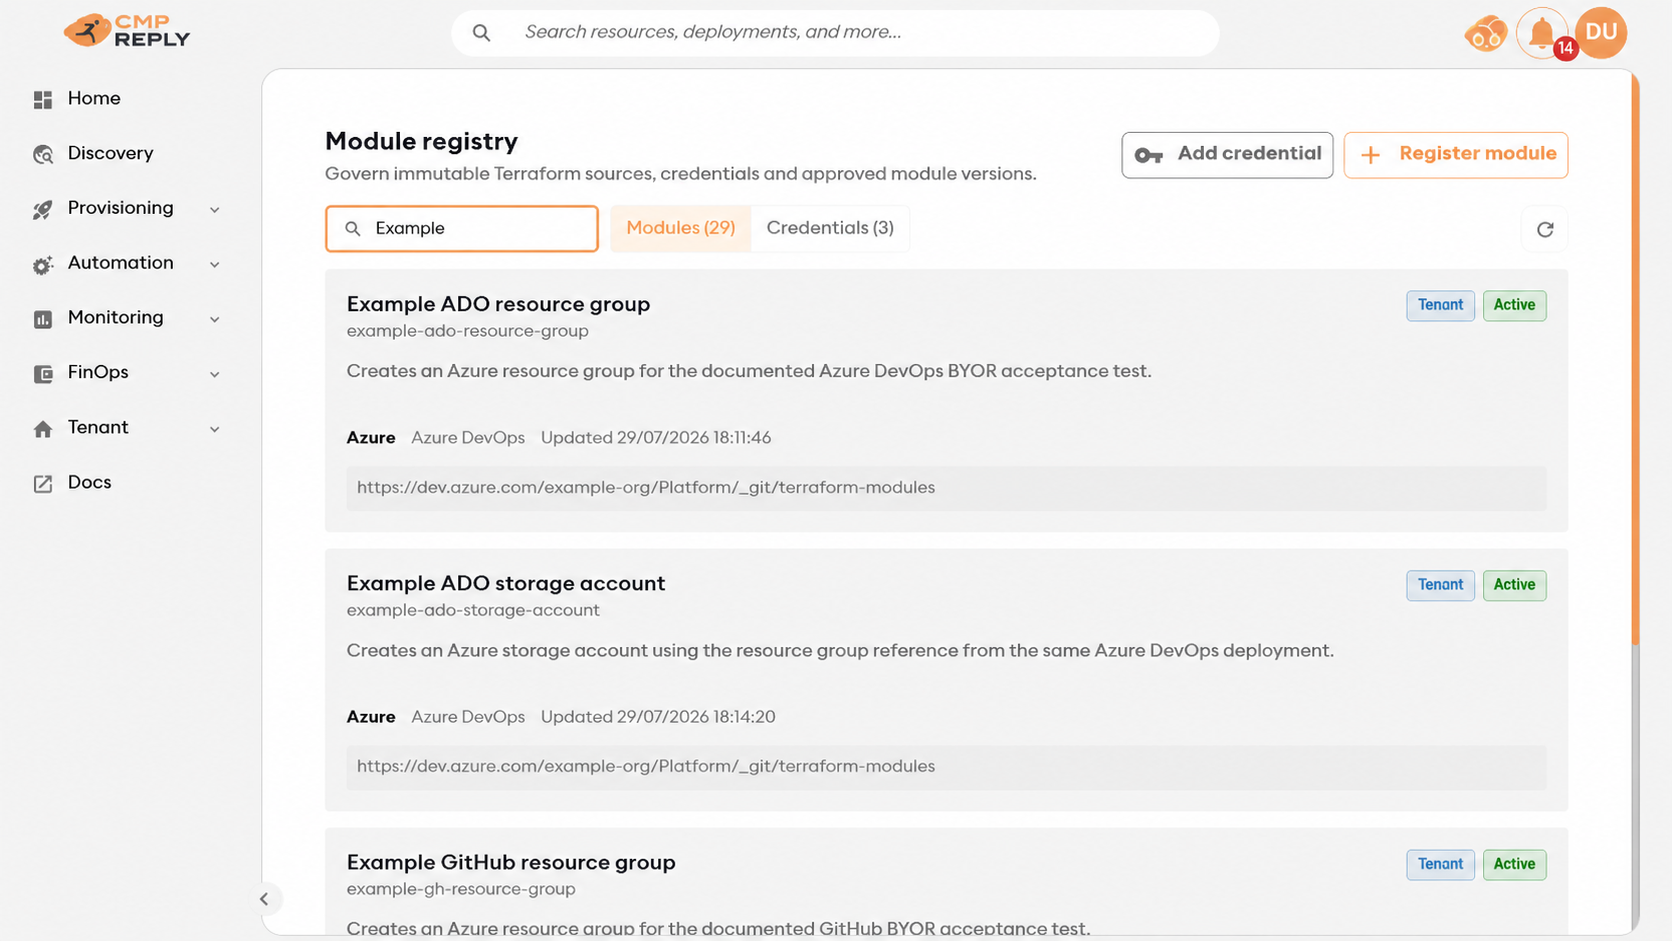
Use search and provider filters to find modules. Open a module to review its repository, immutable versions and validation evidence.#
For example, a monorepo with these paths needs three registrations:
modules/network
modules/storage
modules/database
All three records can use the same repository and credential, but each has its own versions and approvals.
Add a credential#
Open Credentials → Add credential when the repository is private or Reply CMP must start a customer runner.
Type |
Use it for |
|---|---|
Azure DevOps PAT |
Read an Azure DevOps repository and start the selected pipeline. |
GitHub fine-grained token |
Read and dispatch one or more explicitly selected repositories. |
GitHub App |
Organisation-managed GitHub access with central installation and key rotation. |
Enter the secret once and optionally choose its next rotation date. Reply CMP stores it in the tenant vault; the value is never returned to the UI or passed to Terraform.
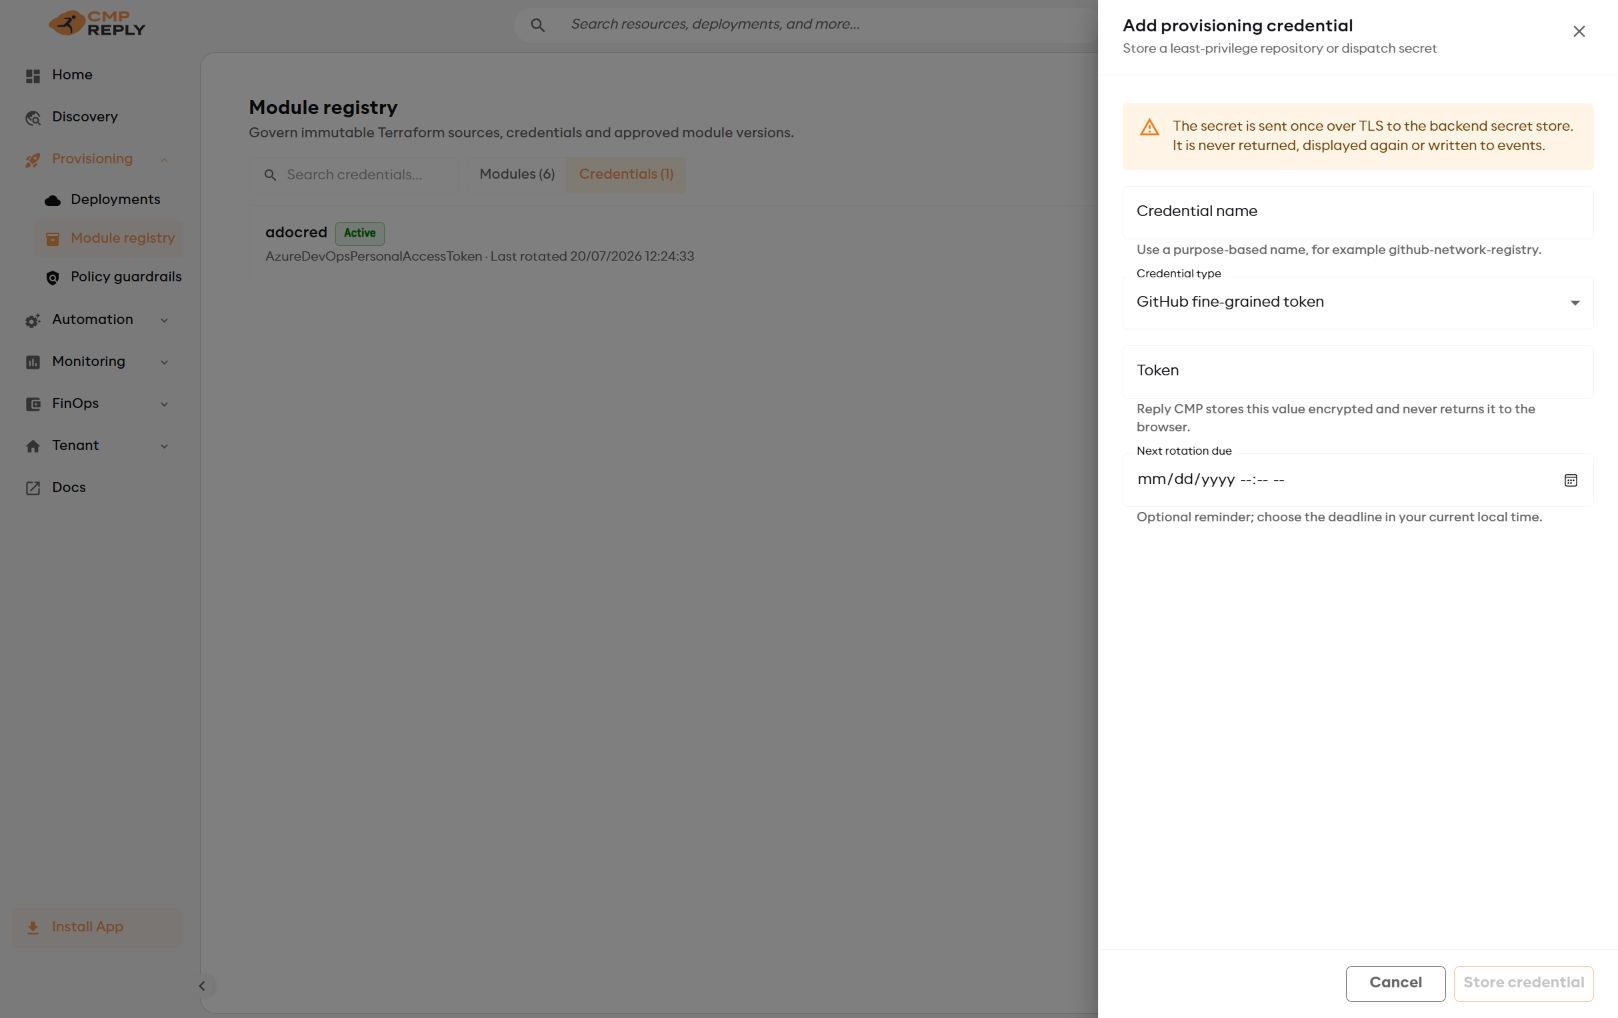
Use a purpose-based name so operators can identify where the credential is used.#
Rotate replaces the secret without changing references from modules or Deployments. Revoke prevents new repository reads and runner dispatches. Remove a credential record only after nothing uses it.
GitHub credential permissions#
Use a credential that is installed or scoped to the actual repository owner. The three GitHub credential types do not have the same least-privilege model.
Reply CMP task |
Fine-grained PAT |
GitHub App private key |
Classic PAT |
|---|---|---|---|
Register a module and read a committed version |
Select the repository and grant Contents: Read-only |
Install the App on the repository and grant Contents: Read-only |
repo scope for a private repository |
List runner branches and workflows |
Contents: Read-only, Actions: Read-only |
Contents: Read-only, Actions: Read-only |
repo scope for a private repository |
Start a GitHub Actions Plan or Apply |
Contents: Read-only, Actions: Read and write |
Contents: Read-only, Actions: Read and write |
repo scope for a private repository |
Set up the Reply CMP protected Environment and callback trust |
Contents: Read-only, Actions: Read and write, Administration: Read and write, Environments: Read and write |
Install the App on the repository with Contents: Read-only, Actions: Read and write, Administration: Read and write, Environments: Read and write |
repo scope for a private repository |
For a fine-grained PAT, set the Resource owner to the person or organisation that owns the repository, then select only the required repositories. A token scoped to All repositories under a personal account does not cover an organisation repository. An organisation can require owner approval before a fine-grained token becomes usable. A GitHub App follows the same repository boundary through its installation: install it only on the required repositories.
A classic PAT is supported for compatibility but is not the recommended choice: the repo scope is broader than the explicit repository permissions above. GitHub can also block classic PAT access to an organisation. Reply CMP never needs the GitHub App Workflows permission because it does not create or modify workflow YAML files.
The explicit Set up environment action creates the protected Environment, restricts it to the chosen branch and opts the selected repository into GitHub’s immutable OIDC subject while preserving its existing claim-key template. This gives the Reply CMP callback an immutable repository identity without asking users to manage a callback app registration. It does not copy Azure, AWS or GCP Connection data into GitHub: Terraform and its state backend receive the exact vault-pinned Connection credentials only when the runner claims an operation. You can use an elevated credential only for this setup action, then select a separate lower-privilege runtime credential before saving the runner.
GitHub documents these permissions separately for workflow dispatch, Environments and branch policies and OIDC subject configuration. Their permissions are additive for the setup operation.
Important
Registering a module and configuring a runner are separate actions. A module repository does not need a workflow. The Workflow list appears only after you select the repository that contains the GitHub Actions runner file.
Register one module#
Select Register module and complete the identity and source sections.
1. Identify the module#
Field |
What to enter |
|---|---|
Module name |
Stable lowercase identifier, for example |
Display name |
Friendly catalogue name, for example |
Cloud provider |
Azure, AWS or GCP. |
Source provider |
Azure DevOps or GitHub. |
Description |
What the module creates and when a team should use it. |
2. Connect the source#
Field |
What to enter |
|---|---|
Canonical repository URL |
Repository root, not a branch or folder URL. |
Module path |
Folder relative to the repository root. Leave empty only when the module is at the root. |
Default ref |
Protected branch or tag proposed for the next version. |
Repository credential |
An active matching credential, or empty for a public repository. |
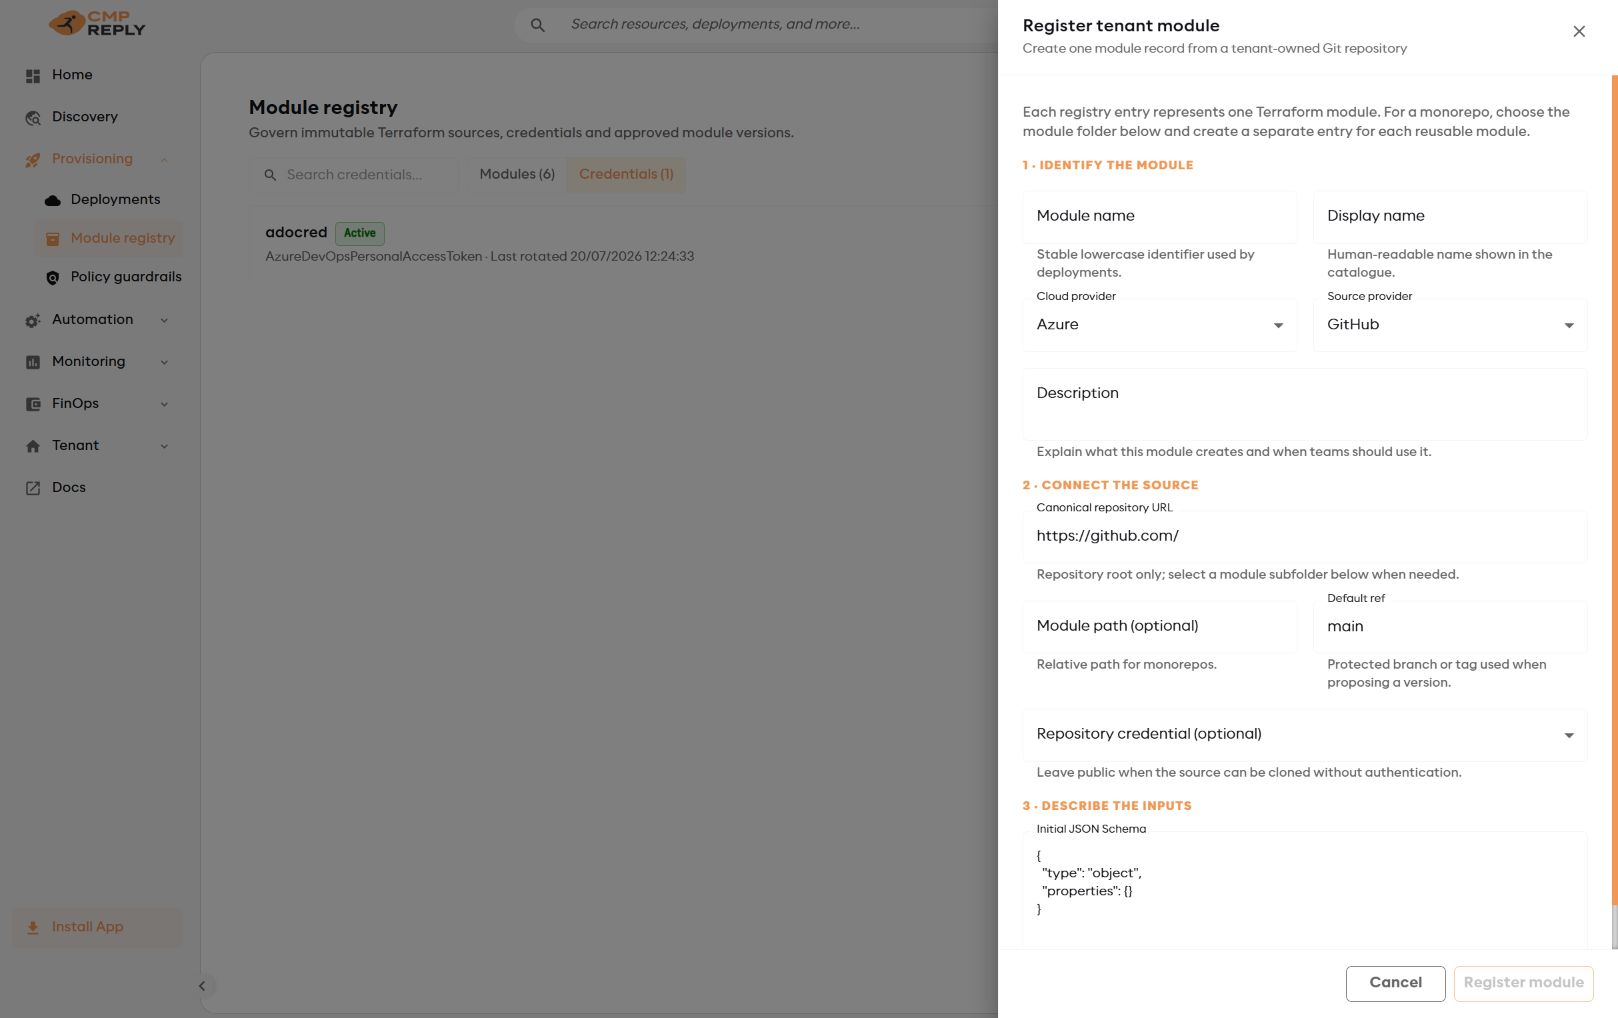
One registration represents one module path, even when the repository contains many modules.#
Registration stores where the module lives; it does not ask you to paste an input
schema. When you add a version, Reply CMP reads and validates schema.json,
.terraform.lock.hcl and the Terraform files from the exact selected commit.
Prepare the module folder#
The registered folder must contain:
Terraform
.tffiles;schema.jsondescribing the user-editable module input;.terraform.lock.hclcontaining checksums for every provider used by the module;root variables
environment,tenant_id,deployment_name,locationandresource_name.
Create provider locks from that exact folder and commit the result:
terraform providers lock
git add .terraform.lock.hcl
git commit -m "Lock Terraform providers"
The current module contract requires Terraform 1.15.8. Provider configuration and credentials belong to the runner, not inside the reusable module.
Important
Do not type provider checksums into Reply CMP. The platform reads schema.json and .terraform.lock.hcl from the exact selected commit and validates them automatically.
State, plan, tfvars, certificate, private-key, .git and .terraform files are rejected from module archives.
Prepare a module with an AI coding assistant#
Reply CMP provides two optional Agent Skills for repositories maintained with GitHub Copilot, Claude Code, Codex or another compatible coding assistant. A skill contains reviewable instructions only: it does not receive Reply CMP credentials and it must never run Plan or Apply.
Skill |
Use it when |
|---|---|
Generate Reply CMP schema |
The Terraform inputs already exist and you want the assistant to create or repair |
Author a Reply CMP module |
You want the assistant to prepare or review the complete module folder, including platform inputs, provider locks and prohibited patterns. |
Extract the selected ZIP into the project skill directory used by your assistant:
Assistant |
Project location |
|---|---|
Codex |
|
GitHub Copilot |
|
Claude Code |
|
Commit the skill with the repository so module owners and reviewers use the same contract. Then ask the assistant, for example: Use reply-cmp-generate-schema to generate schema.json for this module. Always review the Terraform and generated schema before registering a version.
Add and approve a version#
Open the module and select Add version.
Choose repository source.
Enter a new semantic version such as
1.2.0.Enter a protected tag or branch. A protected tag is recommended for releases.
Keep Terraform version
1.15.8.Submit the version.
Open the version and review its exact commit, source link, schema, connected credential or public-source status, provider locks and validation result.
Approve it when the evidence is correct.
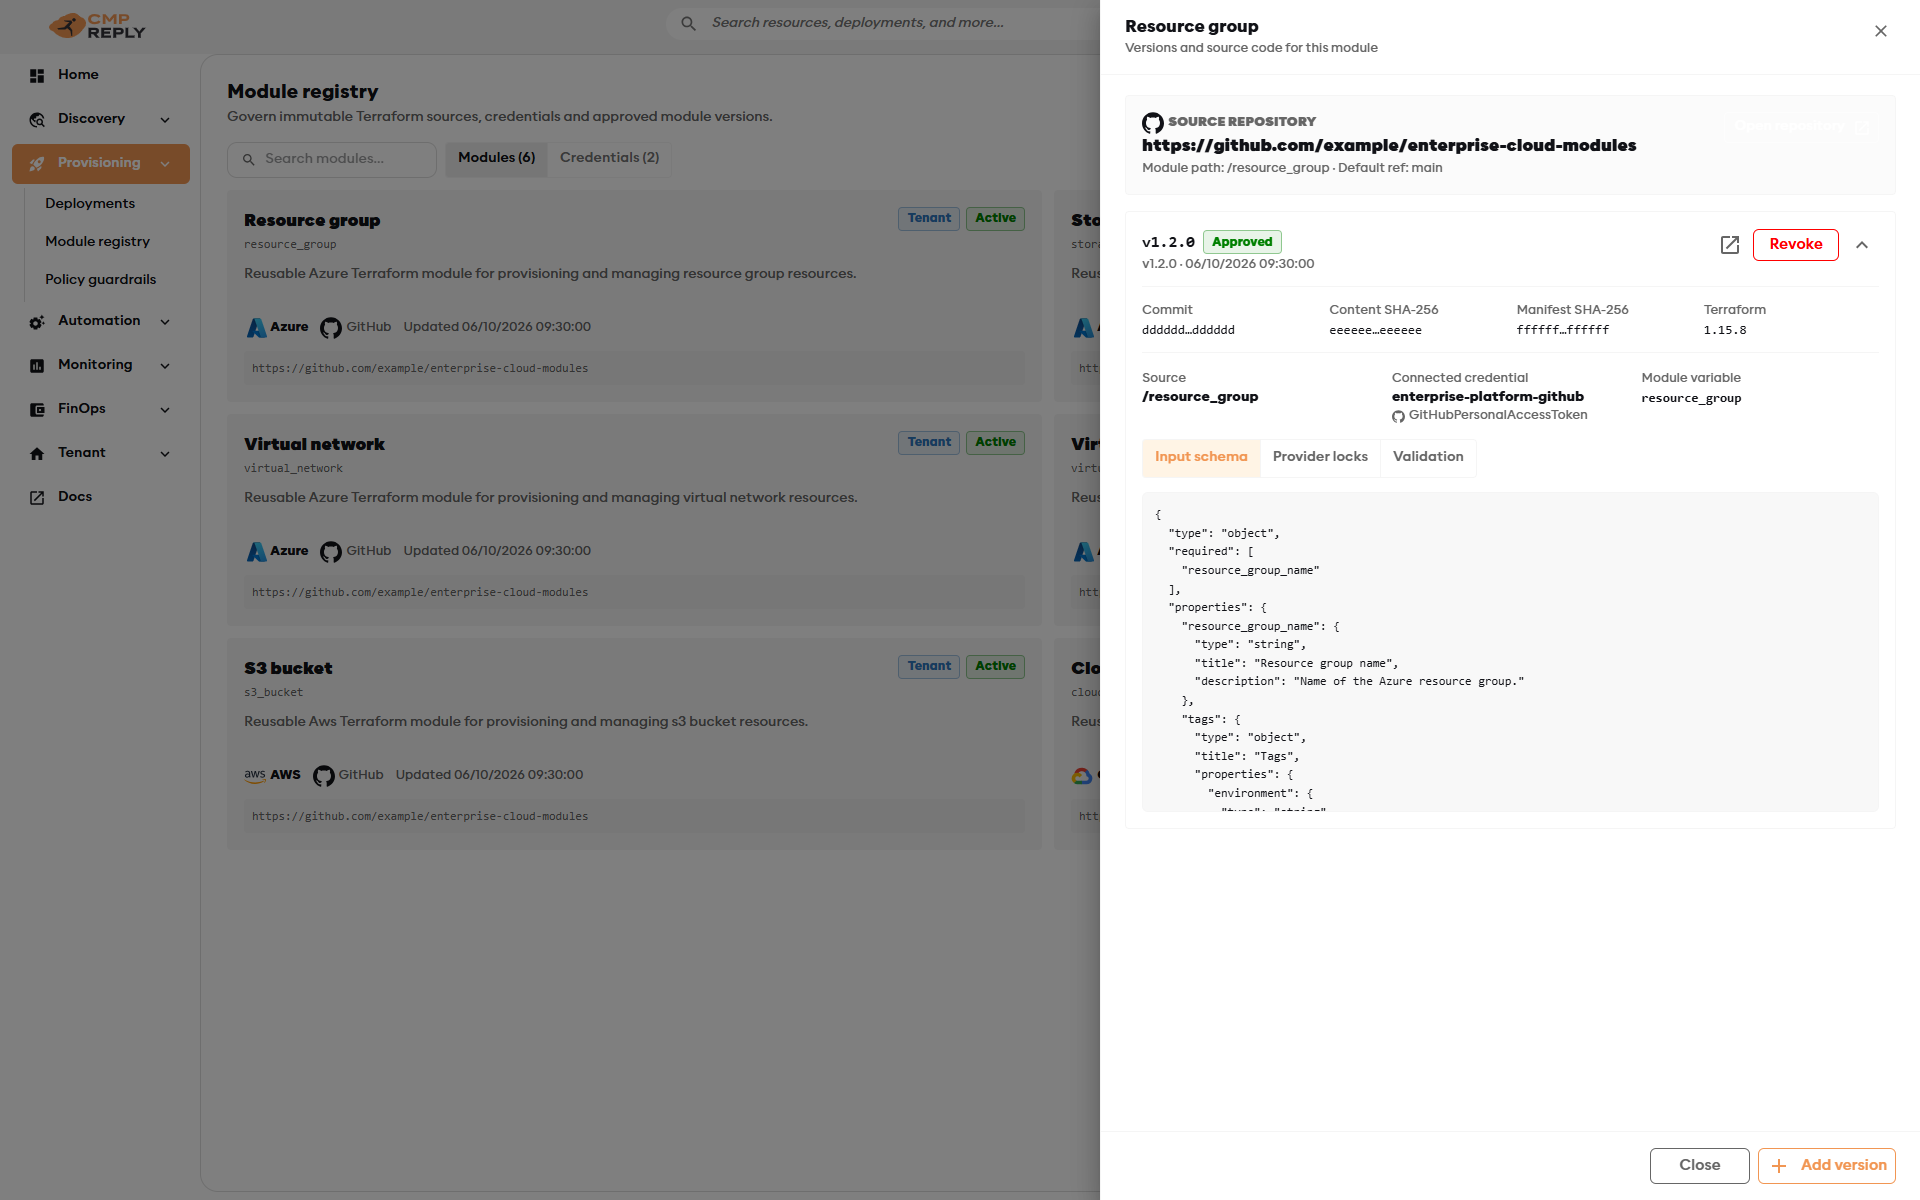
Example approved enterprise module version and its immutable source evidence.#
State |
Meaning |
|---|---|
Pending |
Validation passed and review is required. |
Approved |
The version can be selected by new or existing Resources. |
Rejected |
Review was closed with a reason; create another version from corrected source. |
Revoked |
New use is blocked while history remains visible. |
Approval and revocation never rewrite an existing version. If a branch later moves, the approved version remains pinned to the original commit and content digests.
Update one Resource to another version#
Approving a new module version does not upgrade existing Resources automatically.
Open Deployments → your Deployment → Resources.
Open the Resource to update.
Select Change module version.
Choose an approved version and review the read-only version details.
Complete any new required inputs. Existing compatible values are carried forward.
Save the Resource. Only this Resource becomes
Draft.Create a fresh Plan and review replacements and deletes before Apply.
Repeat this process only for the Resources that should adopt the new version.
Starter repositories#
The starter packages contain a valid example module, schema, provider lock and the complete runner contract.